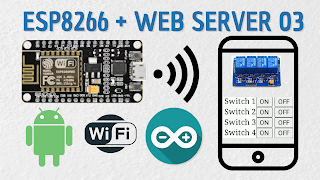
ESP8266 เป็นเว็บเซิฟเวอร์ คุมรีเลย์ 4 ช่อง control by HTML
อุปกรณ์
1. บอร์ด esp8266
2. เครื่องคอมพิวเตอร์
3. สายเชื่อมต่อ usb หรือสำหรับอัพโหลดโปรแกรมและจ่ายพลังงาน
4. Relay 4 channel
ขั้นตอนและวิธีการสร้าง
ขั้นตอนที่ 1. ทำความเข้าใจเกี่ยวกับโค้ดเว็บไซต์ HTML
บันทึกเป็นไฟล์ helloworld.html
(คลิปก่อนหน้านี้)
ขั้นตอนที่ 2: การสร้างเว็บเซิร์ฟเวอร์บน ESP8266
ให้ใช้งานได้ (คลิปก่อนหน้านี้)
ขั้นตอนที่ 3: สร้างลิงค์ บนเว็บ
ให้งานงาน on/off ได้ โดยไม่เปลี่ยน page
target="thispage" และ
<iframe name="thispage">
ขั้นตอนที่ 4:เชื่อมต่อกับ Relay ให้ครบ 4 ขา
ESP8266 -> Relay 4 channel
3V -> VCC
D1(GPIO5) -> In1
D2(GPIO4) -> In2
D5(GPIO14)-> In3
D6(GPIO12)-> In4
GND -> GND
จั้มสายและเชื่อมบอร์ดกับพีซี ให้ใช้งานได้
ขั้นตอนที่ 5:ปรับโค้ดโปรแกรม
int r1 = 5;
int r2 = 4;
int r3 = 14;
int r4 = 12;
เพิ่ม tags <button> ON</button>
<CENTER>
<h1>Hello World ESP8266 EP02</h1>
Switch 1<a href="Sw1on" target="thispage1"><button> ON</button></a>
<a href="Sw1off" target="thispage1"><button> OFF</button></a><br>
Switch 2<a href="Sw2on" target="thispage2"><button> ON</button></a>
<a href="Sw2off" target="thispage2"><button> OFF</button></a><br>
Switch 3<a href="Sw3on" target="thispage3"><button> ON</button></a>
<a href="Sw3off" target="thispage3"><button> OFF</button></a><br>
Switch 4<a href="Sw4on" target="thispage4"><button> ON</button></a>
<a href="Sw4off" target="thispage4"><button> OFF</button></a><br>
<iframe name="thispage1" width="130" height="50" frameBorder="0"></iframe>
<iframe name="thispage2" width="130" height="50" frameBorder="0"></iframe><br>
<iframe name="thispage3" width="130" height="50" frameBorder="0"></iframe>
<iframe name="thispage4" width="130" height="50" frameBorder="0"></iframe>
</CENTER>
เพิ่มส่วนการทำงานของสวิตช์
void handleSw2on() {
Serial.println("Switch2 On");
digitalWrite(r2,LOW);
server.send(200, "text/html", "Switch 2 ON");
}
void handleSw2off() {
Serial.println("Switch2 Off");
digitalWrite(r2,HIGH);
server.send(200, "text/html", "Switch 2 OFF");
}
void handleSw3on() {
Serial.println("Switch3 On");
digitalWrite(r3,LOW);
server.send(200, "text/html", "Switch 3 ON");
}
void handleSw3off() {
Serial.println("Switch3 Off");
digitalWrite(r3,HIGH);
server.send(200, "text/html", "Switch 3 OFF");
}
void handleSw4on() {
Serial.println("Switch4 On");
digitalWrite(r4,LOW);
server.send(200, "text/html", "Switch 4 ON");
}
void handleSw4off() {
Serial.println("Switch4 Off");
digitalWrite(r4,HIGH);
server.send(200, "text/html", "Switch 4 OFF");
}
เพิ่มในส่วนของ void setup()
//ตั้งค่า พินเลข เป็นเอาท์พุต
pinMode(r1, OUTPUT);
pinMode(r2, OUTPUT);
pinMode(r3, OUTPUT);
pinMode(r4, OUTPUT);
//เปิดจ่ายไฟ ค่าพินเลข เพื่อปิดการทำงานของ Relay
digitalWrite(r1, HIGH);
digitalWrite(r2, HIGH);
digitalWrite(r3, HIGH);
digitalWrite(r4, HIGH);
เพิ่มส่วนของ server.on
server.on("/Sw2on", handleSw2on); //as Per <a href="ledOn">, Subroutine to be called
server.on("/Sw2off", handleSw2off);
server.on("/Sw3on", handleSw3on); //as Per <a href="ledOn">, Subroutine to be called
server.on("/Sw3off", handleSw3off);
server.on("/Sw4on", handleSw4on); //as Per <a href="ledOn">, Subroutine to be called
server.on("/Sw4off", handleSw4off);
///// complete code
#include <ESP8266WiFi.h>
#include <WiFiClient.h>
#include <ESP8266WebServer.h>
//SSID and Password of your WiFi router
const char* ssid = "Nui 2.4G";
const char* password = "0895515998";
ESP8266WebServer server(80); //Server on port 80
int r1 = 5;
int r2 = 4;
int r3 = 14;
int r4 = 12;
const char MAIN_page[] PROGMEM = R"=====(
<HTML>
<HEAD>
<TITLE>My first web page</TITLE>
</HEAD>
<BODY>
<CENTER>
<h1>Hello World ESP8266 EP02</h1>
Switch 1<a href="Sw1on" target="thispage1"><button> ON</button></a>
<a href="Sw1off" target="thispage1"><button> OFF</button></a><br>
Switch 2<a href="Sw2on" target="thispage2"><button> ON</button></a>
<a href="Sw2off" target="thispage2"><button> OFF</button></a><br>
Switch 3<a href="Sw3on" target="thispage3"><button> ON</button></a>
<a href="Sw3off" target="thispage3"><button> OFF</button></a><br>
Switch 4<a href="Sw4on" target="thispage4"><button> ON</button></a>
<a href="Sw4off" target="thispage4"><button> OFF</button></a><br>
<iframe name="thispage1" width="130" height="50" frameBorder="0"></iframe>
<iframe name="thispage2" width="130" height="50" frameBorder="0"></iframe><br>
<iframe name="thispage3" width="130" height="50" frameBorder="0"></iframe>
<iframe name="thispage4" width="130" height="50" frameBorder="0"></iframe>
</CENTER>
</BODY>
</HTML>
)=====";
void handleRoot() {
server.send(200, "text / plain", MAIN_page);
}
void handleSw1on() {
Serial.println("Switch1 On");
digitalWrite(r1,LOW);
server.send(200, "text/html", "Switch 1 ON");
}
void handleSw1off() {
Serial.println("Switch1 Off");
digitalWrite(r1,HIGH);
server.send(200, "text/html", "Switch 1 Off");
}
void handleSw2on() {
Serial.println("Switch2 On");
digitalWrite(r2,LOW);
server.send(200, "text/html", "Switch 2 ON");
}
void handleSw2off() {
Serial.println("Switch2 Off");
digitalWrite(r2,HIGH);
server.send(200, "text/html", "Switch 2 OFF");
}
void handleSw3on() {
Serial.println("Switch3 On");
digitalWrite(r3,LOW);
server.send(200, "text/html", "Switch 3 ON");
}
void handleSw3off() {
Serial.println("Switch3 Off");
digitalWrite(r3,HIGH);
server.send(200, "text/html", "Switch 3 OFF");
}
void handleSw4on() {
Serial.println("Switch4 On");
digitalWrite(r4,LOW);
server.send(200, "text/html", "Switch 4 ON");
}
void handleSw4off() {
Serial.println("Switch4 Off");
digitalWrite(r4,HIGH);
server.send(200, "text/html", "Switch 4 OFF");
}
void setup(void){
Serial.begin(115200);
//ตั้งค่า พินเลข เป็นเอาท์พุต
pinMode(r1, OUTPUT);
pinMode(r2, OUTPUT);
pinMode(r3, OUTPUT);
pinMode(r4, OUTPUT);
//เปิดจ่ายไฟ ค่าพินเลข เพื่อปิดการทำงานของ Relay
digitalWrite(r1, HIGH);
digitalWrite(r2, HIGH);
digitalWrite(r3, HIGH);
digitalWrite(r4, HIGH);
WiFi.begin(ssid,password); //Connect to your WiFi router
Serial.println("");
//คำสั่งสำหรับ พยายามเชื่อมต่อจนกว่าจะได้
// Wait for connection
while (WiFi.status() != WL_CONNECTED) {
delay(500);
Serial.print(".");
}
//If connection successful show IP address in serial monitor
Serial.println("");
Serial.print("Connected to ");
Serial.println(ssid);
Serial.print("IP address: ");
//พิมพ์หมายเลขไอพี เพื่อเปิดดูในหน้าเว็บ
Serial.println(WiFi.localIP()); //IP address assigned to your ESP
server.on("/", handleRoot); //Which routine to handle at root location
server.on("/Sw1on", handleSw1on); //as Per <a href="ledOn">, Subroutine to be called
server.on("/Sw1off", handleSw1off);
server.on("/Sw2on", handleSw2on); //as Per <a href="ledOn">, Subroutine to be called
server.on("/Sw2off", handleSw2off);
server.on("/Sw3on", handleSw3on); //as Per <a href="ledOn">, Subroutine to be called
server.on("/Sw3off", handleSw3off);
server.on("/Sw4on", handleSw4on); //as Per <a href="ledOn">, Subroutine to be called
server.on("/Sw4off", handleSw4off);
server.begin(); //Start server
Serial.println("HTTP server started");
}
void loop(void){
server.handleClient(); //Handle client requests
}
/////////////////////////////////////////////////
Relate:
https://gnipsel.com/esp8266/esp8266_01.html
https://circuits4you.com/2018/02/05/esp8266-arduino-wifi-web-server-led-on-off-control/

ความคิดเห็น
แสดงความคิดเห็น